Video of the Week Archive
Signing Out of CSDDocs
|
Google accounts are quite clingy and don't go away after just signing out in any web browser. Sometimes, it will even lock you out until another account is logged in and then removed. Watch the video below to learn how to sign out and remove CSDDocs account from your internet browser.
|
|
Speak It Chrome Extension
|
If you have students with the accommodation to have a test read out loud, the Speak It Chrome extension can speak highlighted text from a Chrome browser. This works great with Canvas or other online quizzes or websites. Follow the directions in the video below to add the extension.
In order to adjust the rate and pitch, you will need to select a non-default voice. Right click the SpeakIt icon in the top right corner of Chrome and select Options. Select a new Search Engine voice from the drop-down menu. I only recommend using Samantha, Moira, or iSpeech-US English Male or Female voices. The other voices are too distracting. |
|
Zaption
|
Do you ever find yourself pausing videos to interject questions, explain a word, or provide background information? Zaption is a great tool to do that for you! Find a video online or upload your own, then add text, images, drawings, or quiz questions that play or the video or pause the video for a specified amount of time or until you click Play. Watch the video below to make your first Zaption tour!
|
|
Virtual Field Trips with 360 Cities
|
Wish you could take your class on a field trip but don't have the budget or time to travel around the world? Try 360Cities.net! This free web-based tool lets you see the world in 360-degree spherical panoramic beauty!
Click to learn more about Virtual Field Trips or Animal Planet Live Feeds. |
|
Backup Photos Using OneDrive
|
It's always a good idea to back up any data that you don't want to lose and that includes photographs. Use OneDrive for up to 30 GB of free storage to automatically back up your photos on your smart phone. The instructions in the video below are for an iPhone, but the app and settings also work for Android. Whatever device you use, please back it up!
|
|
UEN Teacher Toolbox
|
UEN Teacher Toolbox is an amazing collection of resources and tools available to you and your students at NO COST! One of my favorite tools is the Student Interactives. They are a fun and engaging way to bring curriculum to life! There are interactives available for every content area and grade level. Take a few minutes to watch this overview and fill out the survey. The first 20 teachers at each school to respond get a prize!
|
|
Guided Access
|
Guided Access is an accessibility option to limit users to a single app for your iPhone or iPad. You can circle areas you would like to disable (such as advertisements). You can even disable the buttons (volume, sleep). This is a great way to keep your information secure that is auto-saved on other apps (ie email, social media, etc).
NOTE: The instructions below are to enable Guided Access. Once you enable guided access, to use it at a later time, you will only need to follow steps 7-10. |
|
1. Open Settings app, then choose General > Accessibility > Guided Access.
2. Toggle the Guided Access switch to the ON position.
3. Tapping the Passcode Settings button lets you choose a passcode when Guided Access is enabled. Tap the button at the top left to return to the Guided Access menu.
4. Optional: Set a time limit
5. Finally, we have an Accessibility Shortcut toggle. If enabled it will display your Accessibility Shortcut settings when the Home button is triple-clicked while Guided Access is enabled. If you don't have any accessibilty features enabled, you can leave the switch in the OFF position.
6. Press the Home button and launch an app you would like to lock your device.
7. Triple-click the Home button to activate Guided Access. You will see a previwe of the app that your device will be locked to. You can draw circle areas on the screen to mark out areas and controls you would like to disable.
8. Tap the Options button at the bottom left to bring up an assortment of features that can be enabled for disabled while in Guided Access mode. These include the sleep/wake button, volume buttons, motion, keyboards, and touch. You can also set a time limit.
9. Tap the Start button at the top right to begin. You will be asked to select a passcode and confirm it.
10. To exit Guided Access mode, triple-click the Home button and enter the passcode. Click End to use the device as usual.
Source: iClarified
Cross-Listing Courses in Canvas
Cross-listing courses in Canvas is a great way to keep all of your classes together, especially in regular and Honors sections where most of the information is the same. To cross-list, you will have a parent and a child course. The child course is where you establish the cross-link to the parent course and usually has fewer sections.
|
1. Go to the course you wish to add as a child course and select Settings found on the bottom left side navigation.
2. Click on the Sections tab and then click on the name of the section under Course Sections. 3. Click the Cross-List this Section button on the upper right side of the page. 4. Search for the course you wish to select as the parent course and click Cross-List this section button. 5. Cross-linking is complete! Students will show up in Grades and People. |
|
Kahoot
|
Kahoot is a game-based assessment tool that works on ALL internet-enabled devices. Sign up for a FREE account at getkahoot.com to create your own quiz or use a public quiz. Students access the quiz at kahoot.it on their tablet, smart phone, or computer. As students answer questions quickly and correctly, points are awarded and the leaderboard is shown in between each question.
|
|
Watching YouTube Videos
|
YouTube is the second largest search engine after Google. Knowing how to safely show YouTube videos in a class environment is a must. Use Quietube to remove the comments and recommended videos on a page and TubeChop to remove the beginning or end of a video. The video below shows you in less than 2 minutes how to use both sites.
|
|
Paper Slides
|
Looking for a low-tech, creative way for students to present information without having to stand in front of the class? Check out Paper Slides. Paper Slides is a technique that uses paper, markers, and student's creativity! The slides are made, then filmed ONCE without editing (practice is crucial), and can be uploaded to YouTube and shared on Canvas. Paper Slides can be used as an individual or group project on any subject! Make sure to give the students guidelines (# of slides, time frame to create, filming time limit, etc). Watch the video to learn more about Paper Slides. For more guidelines and a storyboard template, check out this website.
|
|
Google Drive
|
Your CSDDocs Google Drive has 30 GB of storage! And the best part is that the Google-formatted documents (Sheets, Forms, Docs, Slides and Drawings) don't count as part of those 30 GB, so you really get much, MUCH more than that! You can also download Google Drive to your computer and save files to it to access on the web, another device or as a backup. It's just like Dropbox but better. Watch the video for instructions and click here to download Google Drive.
|
|
Canvas Notification Settings
|
Within Canvas, there is an email system for students to communicate with teachers and vice versa. Stay up-to-date by changing your Notification Preferences to send an email to your school account when a student contacts you. Follow the steps in the video to change your Added to Conversation setting to either Daily or ASAP.
|
|
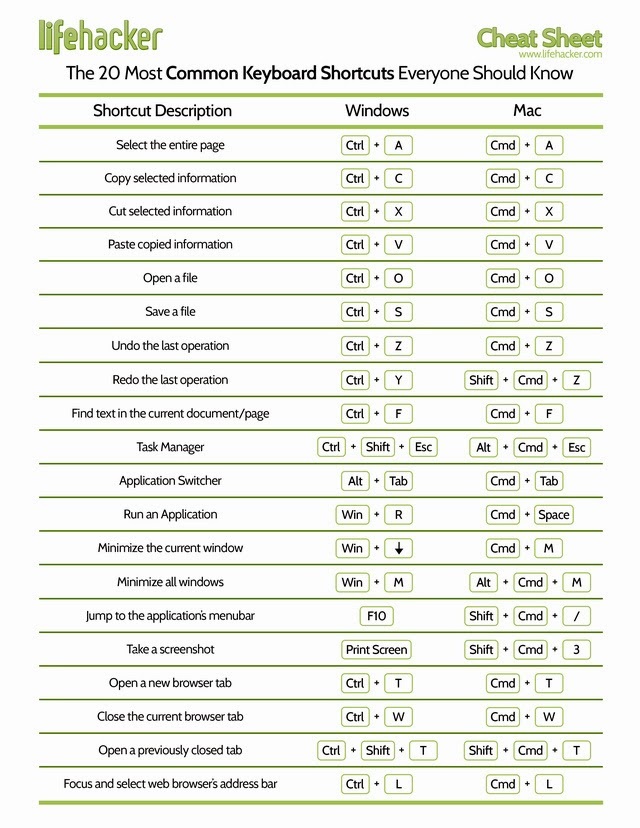
Keyboard Shortcuts
|
Time is precious. The quicker you can get menial tasks completed allows for more time on more important tasks. Learning keyboard shortcuts, like ctrl + c or command + c to copy, keeps your fingers on the keyboard instead of moving them to the mouse or trackpad and can help save time. Most shortcuts involve the command (⌘) key on a Mac or the control (ctrl) key on a PC.
Listed here are some of the most frequently used keyboard shortcuts Image Source: Lifehacker.com (Used with permission). |
|
Plickers
Plickers (or Paper Clickers) are featured in the September 2014 Ed Tech Times Newsletter as an alternative to expensive, electronic clickers. Each student in class gets a paper card with a unique matrix design similar to a QR code. When asked a question, students hold up their card with the correct answer positioned at the top of the card. The teachers scans the room with a smart phone or tablet (iOS or Android) and answers are recorded.
1. Create an account at plickers.com.
2. Create classes on the website, and assign students a plicker number. If students are not assigned a number, results will be gathered anonymously.
3. Build questions on the website or in the iPad app.
4. Make your plicker cards.
5. Give your quiz. TIP: Hold your iPhone/iPad in Portrait mode.
Set of 40 5-1/2" X 5-1/2" Plickers (recommended, scannable from 20-25 feet.)
Set of 40 8-1/2" X 8-1/2" Plickers (scannable from 30-40 feet.)
Set of 63 5-1/2" X 5-1/2" Plickers (for large classes or groups.)
Plickers Answer Key (cut out and glue to the back of each card before laminating.)
Original Post by Jared Ward.
AirDrop for Macs
|
Need to send a file to another teacher but don't want to take up your limited email space? Try using AirDrop. To access AirDrop, open your Finder window and click the AirDrop tab. Then click and drag the desired file(s) or folder(s) to the user's icon. Remember, the larger the file(s), the longer the download process.
|
|
CSDDocs Email Forwarding
|
Now that CSDDocs accounts have been created for all Canyons District teachers and students, you officially have TWO email addresses - @canyonsdistrict.org and @csddocs.org.
Let's make life EASIER with this new service, and set up your CSDDocs email to simply forward to your CanyonsDistrict.org account so you can manage all of your emails in one place. You can also respond to other teacher or student emails from the CSDDocs service. Watch the video or follow the step-by-step directions below. |
|
1. To get started, log in to your CSDDocs account at http://csddocs.org
2. Once you are logged in, go to your CSDDocs email account by clicking the 9 squares and selecting Gmail.
3. Choose the Settings (gear) icon on the right side of your Gmail Screen
4. From the dropdown menu select "Settings"
5. From your new settings screen you will select the "Forwarding" tab
6. In this section you will select the "Forward a copy of incoming mail to..." option and enter your [email protected] email address. You will need to confirm this setting by clicking the link in an email sent to your canyonsdistrict.org email account.
7. In addition to having your email forwarded, you may also decide whether you want the forwarded email to be marked read in your CSDdocs.org account, or even have it deleted. This is a personal choice that you can make based on your email needs.
8. Once you're set here, click the "Save Changes" button. Try sending your csddocs.org account an email just to be sure, but now all of your email here will be forwarded to your canyonsdistrict.org email account.
Original Post from Michael Hakkarinen
DonorsChoose and Other Grants
DonorsChoose.org is a great organization for requesting supplies for a classroom. Chevron has partnered with DonorsChoose.org to support these requests through a program called Fuel Your School. Here's how it works:
Step 1: Submit a Donors Choose grant on or after September 1st. Need help getting started? Ask me!
Step 2: Encourage your students, their parents, families, and friends to fill up at Chevron or Texaco gas stations. Chevron will donate $1 per 8-gallon or more fill-up to support DonorsChoose.org grants in Salt Lake and Davis counties.
Step 3: Encourage students, their parents, families, and friends to directly support your DonorsChoose.org grant via emails, posters, social media, and more!
Sound too good to be true? Several teachers at Midvale Middle and Corner Canyon High Schools received these grants:
Smith's Earn and Learn program let's you support your chocolate, ice cream, or Diet Coke addiction AND your school at the same time! Call 1-800-KROGERS (576-4377), and register your Smith's rewards card with Corner Canyon High School (80259) or Midvale Middle School (80946). Smith's will donate up to 5% of your total. (This does not effect your fuel or rewards points). For a complete list of schools, click here.
NOTE: You must re-enroll every year.
Even more grants are available at the Grants ProLearning page.
Because the Video of the Week wouldn't be complete without a video, check out what Oprah, Michelle Obama, DonorsChoose founder and CEO, Charles Best, and teachers around the U.S. have to say about DonorsChoose.org.
Step 1: Submit a Donors Choose grant on or after September 1st. Need help getting started? Ask me!
Step 2: Encourage your students, their parents, families, and friends to fill up at Chevron or Texaco gas stations. Chevron will donate $1 per 8-gallon or more fill-up to support DonorsChoose.org grants in Salt Lake and Davis counties.
Step 3: Encourage students, their parents, families, and friends to directly support your DonorsChoose.org grant via emails, posters, social media, and more!
Sound too good to be true? Several teachers at Midvale Middle and Corner Canyon High Schools received these grants:
- Royce Shelley - Chromebooks
- Christiana Forbush, John Henrichsen, and Debbie Delliskave - 3 Chromebooks each
- Joey Newman - Tech supplies
- Pam Tafili - 2 iPads
- Amanda Toler, Amelia Davis, and McKay Ballstaedt - Document Cameras
- and many, many more!!
Smith's Earn and Learn program let's you support your chocolate, ice cream, or Diet Coke addiction AND your school at the same time! Call 1-800-KROGERS (576-4377), and register your Smith's rewards card with Corner Canyon High School (80259) or Midvale Middle School (80946). Smith's will donate up to 5% of your total. (This does not effect your fuel or rewards points). For a complete list of schools, click here.
NOTE: You must re-enroll every year.
Even more grants are available at the Grants ProLearning page.
Because the Video of the Week wouldn't be complete without a video, check out what Oprah, Michelle Obama, DonorsChoose founder and CEO, Charles Best, and teachers around the U.S. have to say about DonorsChoose.org.
Importing Canvas ContentAt the end of the 2013-14 school year, I shared how to export a Canvas course. Now that the new year has started, I am sharing how to import the course file. Detailed steps of this process are included below the video.
View the Canvas Guides below for illustrated steps: |
|
1. Open the course that will be the destination for the course import.
2. Click on the "Settings" tab in the left-sidebar navigation.
3. Click the "Import Content Into This Course" button in the right toolbar.
4. From here there are two options you might use in the "Content Type" drop down menu: if you are importing from a course you created, you can select "Copy a Canvas Course." If you are importing from the export/backup file, select "Canvas Course Export Package" from the drop down menu. This second option will require you to locate the backup file on your computer by clicking the "Choose File" button, then locate the .imscc course file you have downloaded to your computer. Click "Choose."
5. IMPORTANT: Check the "Select Migration Content" checkbox.
6. Click the "Import" button.
7. Click the "Select Content" button.
8. Working from the bottom of the list to the top, select the course files that you would like to include in your new course. WARNING: If you already have content in your course, importing Course Settings will overwrite existing settings.
9. Click the "Select Content" button.
Once you have imported all of your content, you can then begin changing dates or other details to make your course fit with your new course and the new term.
AMX Video ReviewAMX is the projector control system mounted in the wall in the classrooms at Corner Canyon High School. There are 8 videos in the YouTube playlist to remind you how to log in, change the volume, adjust source input, and more!
|
| ||
Exporting a Canvas Course
|
As the school year winds down, it is important to back up the documents on your computer to a flash drive, cloud storage (like Google Drive or Dropbox), or external hard drive, as well as your canvas course. All of your course information will be saved in canvas for next year. Exporting your Canvas courses creates a backup and makes sharing easier! Instructions to export a canvas course are in the video and outline below. Instructions for importing a Canvas course will be given in August. Happy Summer!
|
|
1. Navigate to your course in Canvas.
2. Click the Settings link in the left navigation menu.
3. Click the Export Course Content button.
4. Click the Course export type option. Click the Create Export button to begin the export.
NOTE: Exporting a course in Canvas may take a few minutes, depending on its size. You will receive an email when the export is complete.
5. Click on the Click here to download link to download the new export.
Note: The export will be in .imscc format. You can also change the extension from .imscc to .zip and treat it as any other zip file. Files in .imscc format can ONLY be opened by Canvas or other online Learning Management Systems.
Source: Instructure Guides
Infographics in the Classroom
|
Infographics are visual representations of data or information on any topic! Janae Hunt and I presented on the use of infographics in the classrooms at UCET (Utah Coalition for Education Technology) at the beginning of the April. I use Piktochart and easel.ly to create visual handouts, samples of which are included in the Blendspace presentation below.
|
|
Save Money with RetailMeNot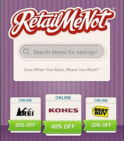
Whenever I shop for home or school, I always check the Retail Me Not iPhone app or website for discount codes to stretch a dollar. Depending on the store, coupon codes are available for in-person and/or online shopping. Start saving today!
|
|
Game Buzzer
This week's app is called Game Buzzer Free. This head-to-head game buzzer is sure to get the competitive juices in your classroom flowing. This app includes an answer timer and has score keeping capabilities. Use this buzzer 1-on-1 or divide your class in half for a competition the whole class can participate in.
The full version of the app costs $1.99 and allows you to adjust answer time and modify preset point values. |
|
Virtual Field Trips
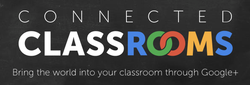
Connected Classrooms, otherwise know as Google Virtual Field Trips is a a fantastic source to bring culture and experience from around the world to right to your classroom. Interact with virtual field trips in real time, or view them later at your convenience. This tool will bring any topic to life! Access Google's Connected Classrooms via the web at http://connectedclassrooms.withgoogle.com/. For more information about Virtual Field Trips, check out this blog post.
|
|
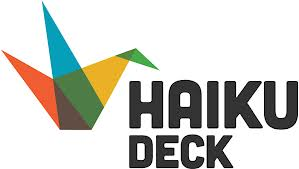
Haiku Deck
|
Click play to view the Blendspace presentation about Haiku Deck, a beautifully simple presentation tool for the web or iPad.
|
|
Fotobabble |
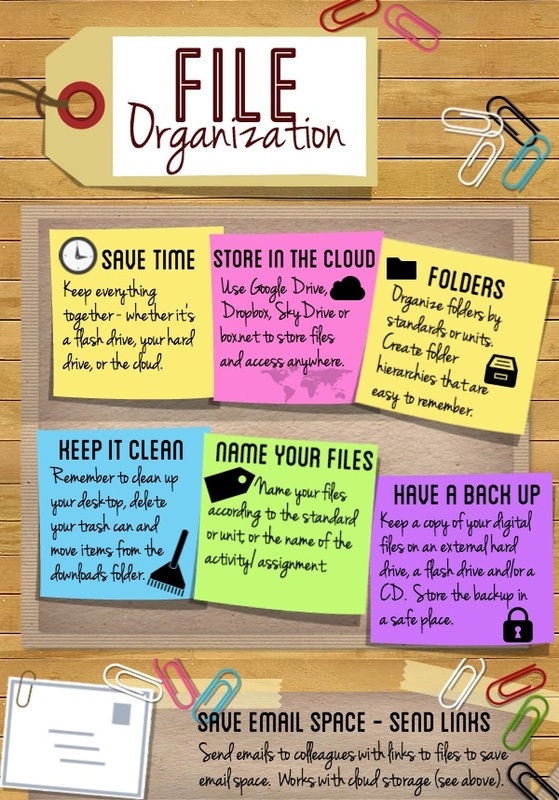
File OrganizationSave time by knowing where your digital files are located. Read the tips below to stay organized. Created with Piktochart.
|
Copyright-free Images
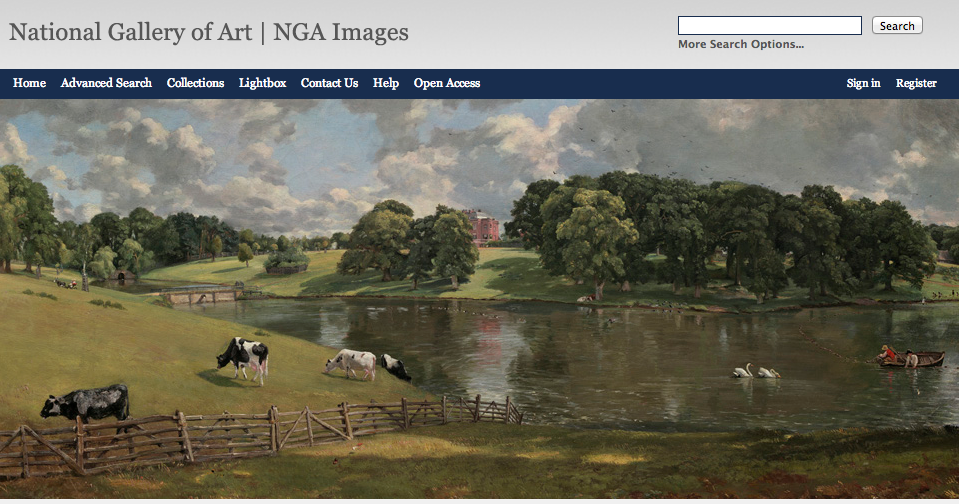
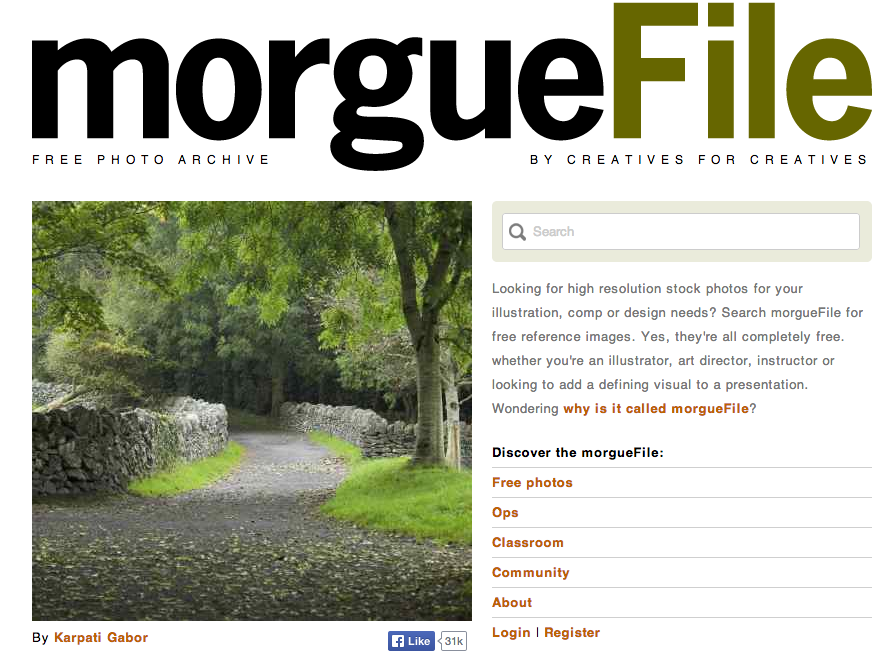
A picture is worth a thousand words! Modeling and teaching appropriate use of images is important. Some of my favorite sites for copyright-free images are below. For a complete list, visit Educational Technology and Mobile Learning.
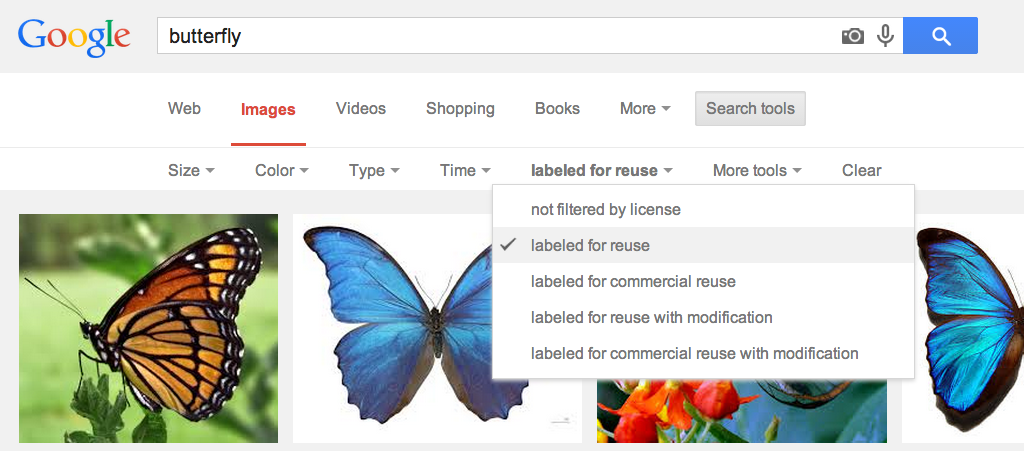
Seach Google Images. Click Search Tools, then Usage Rights. Select Labeled for Reuse.
|
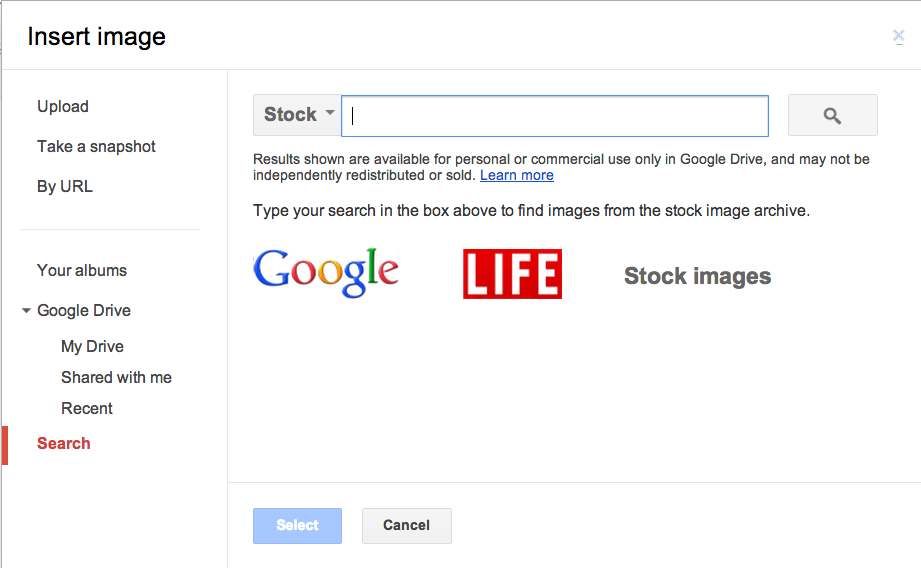
In a Google Doc, click Insert > Image. At the bottom left, click Stock, and choose Stock photos from Google, Life, or Stock Images.
|
|

WeVideo

WeVideo.com is an online video creation program with similar features of iMovie. As Chromebooks, Macs, iPads and PC's are used throughout a course, it can be difficult to find programs that work on all of these devices. WeVideo solves that! As an online program, WeVideo works on Chromebooks, Macs, and PCs! Students and teachers can log in using their CSDDocs Google account. If you take video on the iPad, use the WeVideo Uploader app to upload the video to the website
Why should students create videos in the classroom? Video creation:
Students can even submit their videos to the Canyons District Film Festival! Visit WeVideo for Education to for more information about how to use WeVideo in the classroom. |
Ideas for using student-created videos in the classroom:
|
LucidChart and LucidPress
LucidChart and LucidPress are two products made by a Draper-based company. LucidChart (iPad and web) creates collaborative flow charts and diagrams, and LucidPress (web only) creates interactive and collaboration documents such as newsletters, presentations, etc. I used LucidPress to help edit this month's Ed Tech Times and loved the easy drag and drop features to add content and the ability to add video. Click on the images in the newsletter to enlarge!
Watch the videos below to learn how these great products work! You and your students can sign up for these free programs using your CSDDocs account!
Watch the videos below to learn how these great products work! You and your students can sign up for these free programs using your CSDDocs account!
|
|
|
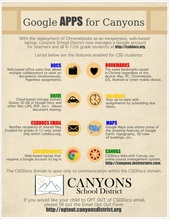
Chromebooks and Google Docs
Chromebooks are an inexpensive, web-based laptop that require a Google account to log in. Canyons School District now manages a Google account, CSDDocs, for all teachers and students at http://csddocs.org. Students and teachers log into their CSDDocs account and Chromebook by adding "@csddocs.org" to the end of the standard computer login.
|
|
Some of the Google Docs features include:
To learn more about how to use Google Docs, please visit the self-paced Canvas course, CSDDocs Fast Track, or request a training by indicating "I'd Like to Learn More" on the Video of the Week Survey.
- collaborate with others in the same document at the same time
- Canvas integration
- 30 GB of storage with Google Drive
- iPad app allows you to edit documents and play slideshows
To learn more about how to use Google Docs, please visit the self-paced Canvas course, CSDDocs Fast Track, or request a training by indicating "I'd Like to Learn More" on the Video of the Week Survey.
SlideShark App

This week's video features the app SlideShark. This is a fantastic app if you are looking for a way to present a PowerPoint on your iPad. This powerful app has lots of features including presenter view with notes, slide annotation, broadcast and sharing capability, and a remote option. This video walks you through how to use the app and how to upload your PowerPoint Presentations. Best of all...it's free! Check it out!
|
|
Find My iPad
If you have an iPad or other Apple device (iPhone or Macbook Pro), knowing how to find it if lost is a MUST! This is a great tip to know even if you misplaced your device in your house, bag/purse, car, or pile of papers on your desk. Please install this app BEFORE traveling for the holidays!
Even though the app and demonstration video use iPhone, the app and features function the same way. Watch the video or follow the written steps below: |
|
1. Install Find my iPhone app on your iPad.
2. Enable Location Services for Find my iPhone app in Settings> Privacy> Location Settings> Turn On AND Settings> iCloud> Log in with iCloud or Apple ID> Turn on Find my iPad.
3. Log onto icloud.com with your Apple ID on your computer or other internet-accessible device.
NOTE: You can use different Apple ID's for your different devices, just remember which is which.
4. Click the Find my iPhone button and select the device you would like to find from the device drop-down menu.
5. After clicking the green button on the map, you can choose to play a sound, lock the device, or erase the device.
Blendspace
|
As a teacher, I would teach with a variety of mediums. I would either have my starter question would be written on the board or show a relevant video, then I would show a PowerPoint, a YouTube clip or two, explain an assignment rubric (Word) and then share some examples from past classes (usually JPG images). For one lesson, I would have several programs open as well as Internet tabs, not to mention email and Skyward.
To simplify the clutter on my computer, I suggest using Blendspace. Blendspace allows for multiple mediums in a single presentation: text, files (Word, PowerPoint, etc), web links, images, videos and more! It's as simple as searching, then dragging and dropping. You can even collaborate with another teacher (or student) to create a Blendspace presentation. Watch the video to learn more! Don't have time to create your own Blendspace? Search for existing presentations created by others. Sign up today at blendspace.com! |
Need additional help using Blendspace? Watch a Blendspace presentation about Blendspace (click play, then use arrows to navigate) or use this simple step-by-step handout.
For the more advanced Blendspace user, you can create different classes and have students enroll in the class to track their progress through a presentation. Students can take quizzes within the presentation as well. |
Student Response Systems
This week's tutorials will evaluate the advantages and disadvantages of 3 different student response systems: Poll Everywhere, Socrative, and Infused Learning. All of these FREE programs require a teacher login, but students do not need to create an account. To keep students in a morning class from accessing the system in an afternoon class, it is helpful to have a different entry code for each class.
Poll EverywherePoll Everywhere is a text message-based response system using student's cell phones. Polls, surveys or questions are created, then the student texts in their response. Answers can be multiple choice (including True/False) or open ended questions.
Advantages:
Disadvantages:
|
SocrativeSocrative is a mobile device app or web-based response system that can be accessed on smart phones, tablets, or computers. Answers can be multiple choice (including True/False) or open ended questions.
Advantages:
Disadvantages:
|
Infuse LearningInfuse Learning is a web-based response system that can be accessed on smart phones, tablets, or computers. Questions can be multiple choice, True/False, drawing, sort & order, open ended text, numeric, or Likert scale (ex: 1-5).
Advantages:
Disadvantages:
Visit this site for more information.
|
TextivateTextivate is a great resource for helping students learn text. Whether they are memorizing The Declaration of Independence or a poem or sonnet from Shakespeare or their own creation, the text can be copied and pasted into the website for students to rearrange into the correct order.
Vocabulary words and definitions can also be copied into the text box for matching activities. Type the words and definitions in the following format: ###match### word==definition Copy and paste the text below to try it out! When in the Course of human events it becomes necessary for one people to dissolve the political bands which have connected them with another and to assume among the powers of the earth, the separate and equal station to which the Laws of Nature and of Nature's God entitle them, a decent respect to the opinions of mankind requires that they should declare the causes which impel them to the separation. |
|
Saving Bookmarks
Many teachers will be changing computers this year and don't want to lose the sites they've bookmarked. Here are two videos that shows you how to export/import your bookmarks on a Macintosh (left) and a PC (right). Written directions are linked below.
Follow these instructions for Safari.
Follow these instructions for Mozilla Firefox.
Follow these instructions for Google Chrome.
Follow these instructions for Internet Explorer.
Follow these instructions for Safari.
Follow these instructions for Mozilla Firefox.
Follow these instructions for Google Chrome.
Follow these instructions for Internet Explorer.
|
|
|
EvernoteThere are so many pieces of Evernote, but I am going to demonstrate the web and computer apps and the web clipper. Evernote is linked with Skitch, Penultimate, Zite (see training examples below), livescribe pen, Evernote Hello, Evernote Food, and many more! Evernote is a great way to compile notes, PDFs, pictures, audio, video, and to do's.
Click here to download the Evernote Web Clipper. For more information about how to use Evernote, visit their How To page. |
|
Safe PasswordsVeronica Belmont, host of The Sync Up, offers some advice on how to choose passwords and well as some tools to help you remember all of your different passwords.
|
|
Add Photos on Your iPad to Dropbox
One way to access the photos on your iPad on your computer is to add them to the Dropbox app on your iPad.
|
|
Skitch
Way to Use Skitch: http://prolearning.canyonsdistrict.org/6/post/2012/09/skitch.html


Zite
Are you ever at a loss for finding current events for your content area? If so, then Zite is the place for you! Zite is a personalized magazine available for apple and android devices. After signing up for the free app, you are able to customize the topics that are available, including science, technology, crafts, gadgets, fashion, interior design, sports, world news, and so much more!!
After perusing the new content of the day, you can tweet the article, save it for later with the Pocket or Evernote apps, or like the article so Zite can personalize the content to you even more! There are many uses for Zite with teachers and students. Happy reading! |
|
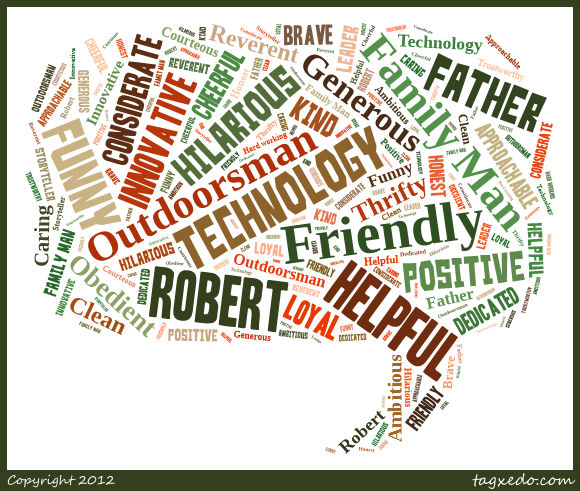
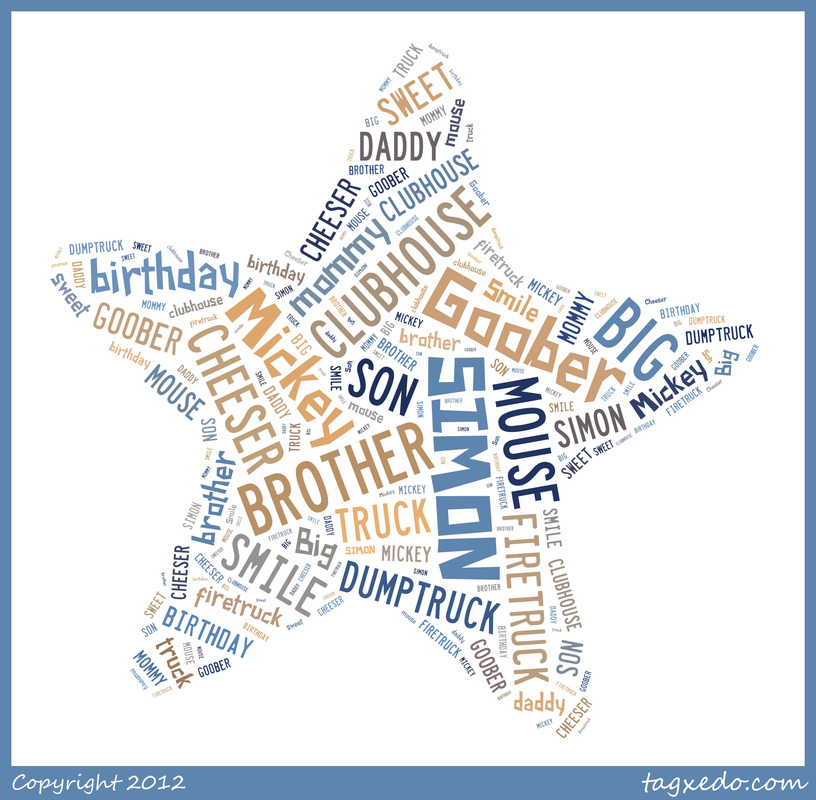
Word Clouds
Word clouds are a great way to express the main ideas of any project! Word clouds can enhance a presentation or website, be used to describe a person or event, use as a card or gift. Changing the shape of the cloud can add to the effect. The possibilities are endless!
Create a free word cloud of your own using Wordle, Tagxedo, or Tagul.
Create a free word cloud of your own using Wordle, Tagxedo, or Tagul.